

Table of Contents
ToggleStaircases eat up vertical real estate like nobody’s business, yet most homeowners leave those walls bare or slap up a single picture frame and call it done. That’s a missed opportunity. The walls flanking your stairs offer a unique canvas, long, uninterrupted sight lines that draw the eye upward and can anchor an entire floor’s design scheme. Whether dealing with a narrow enclosed stairwell or an open-concept staircase, the right decor turns a purely functional space into a focal point. This guide walks through practical, tested approaches to staircase wall decor, from gallery walls and oversized mirrors to budget-friendly DIY projects and lighting strategies that make everything pop.
Key Takeaways
- Staircase wall decor transforms overlooked vertical space into a focal point by leveraging the natural diagonal line and visibility from multiple angles and floors.
- Gallery walls work beautifully on staircases when frames are arranged diagonally with consistent 2–3 inch spacing and organized by limiting frame finishes to one or two styles.
- Oversized artwork or mirrors (36×48 inches or larger) create intentional focal points with minimal effort, while mirrors amplify natural light in narrow stairwells when mounted securely with heavy-duty anchors.
- Budget-friendly DIY options like floating shelves, board-and-batten treatments, peel-and-stick wallpaper, and stenciled features deliver high-impact results for under $100 in materials.
- Layered lighting—including picture lights, wall sconces, LED strips, and three-way switches—is essential to highlight staircase wall decor and improve safety throughout the stairwell.
- Avoid common mistakes like ignoring scale, hanging frames horizontally instead of diagonally, skipping proper wall anchors, and overcrowding the space to maximize the visual impact of your staircase design.
Why Staircase Walls Are Prime Real Estate for Decor
Staircase walls offer something most interior walls don’t: height and drama. A two-story stairwell can give ten to twenty feet of vertical display space, visible from multiple angles and floors. That visibility makes it ideal for creating impact, but it also means mistakes show up from everywhere.
The diagonal angle of the staircase itself creates a natural rhythm. Frames, shelves, or panels installed along the slope guide the eye upward and can make ceilings feel taller. In open-concept homes, the staircase wall often faces the main living area, making it a design anchor for the entire first floor.
From a practical standpoint, staircase walls are high-traffic but low-contact. People walk past them daily but rarely bump into them, so delicate frames, floating shelves, or textured treatments hold up better here than in a hallway kids barrel through. That durability matters when investing time and materials into a project.
Gallery Wall Designs That Make a Statement
Gallery walls work beautifully on staircases because the diagonal line naturally breaks up the grid. The key is planning the layout before hammering a single nail. Lay frames out on the floor in the same diagonal arrangement they’ll hang, then photograph the layout from multiple angles to check spacing.
Materials needed:
- Picture frames (mix of sizes: 8×10, 11×14, 16×20 work well)
- Laser level or chalk line
- Painter’s tape
- Wall anchors rated for frame weight (toggle bolts for drywall, masonry anchors for plaster)
- Measuring tape and pencil
Installation tips:
Start with the largest frame at eye level on the landing or midpoint, then work outward and upward. Keep 2–3 inches of consistent spacing between frames. Use a laser level to establish a diagonal guide line that follows the stair angle, this keeps the arrangement from looking crooked.
For a cohesive look, stick to one or two frame finishes (black and natural wood, for example) and mat all photos or prints uniformly. Black-and-white photography or a single color palette across prints keeps things from looking chaotic. Avoid mixing glossy metal frames with rustic wood unless the rest of the home’s design leans eclectic.
Hanging on an enclosed stairwell with plaster walls? Drill pilot holes and use plastic or metal anchors, plaster alone won’t hold anything heavier than a postcard. For accent walls painted in bold colors, gallery walls benefit from neutral frames that let the wall hue show through between pieces.
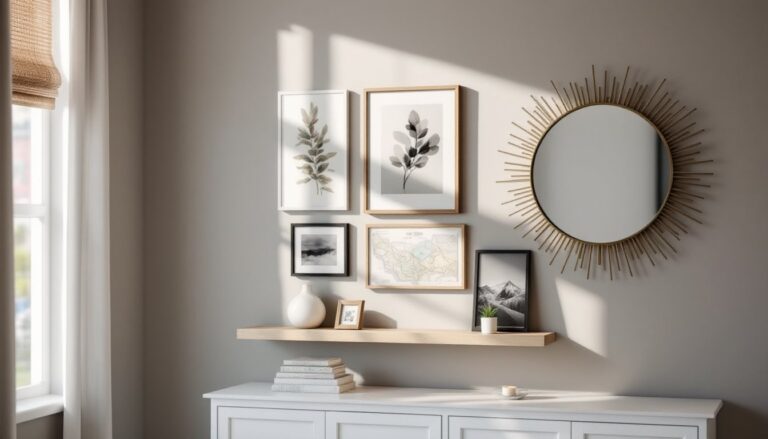
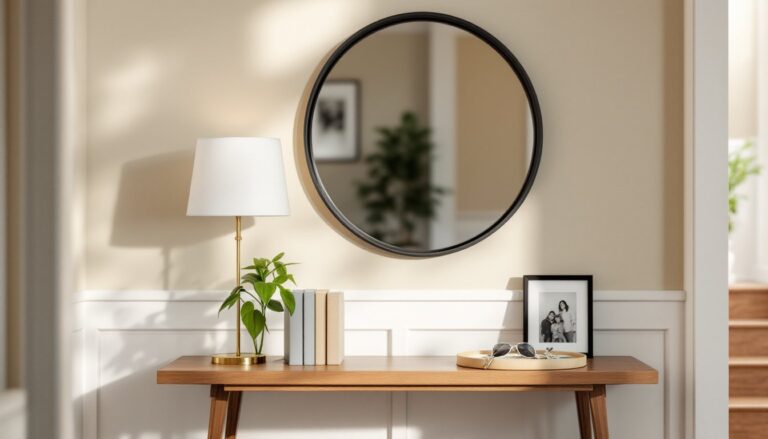
Using Artwork and Mirrors to Enhance Vertical Space
Oversized artwork or mirrors make staircase walls feel intentional without the fuss of arranging dozens of smaller pieces. A single large canvas (36×48 inches or bigger) centered on the wall creates a focal point visible from the entryway or living room.
Mirrors amplify natural light, especially on staircases with windows at the landing or top. A tall vertical mirror, think 24×60 inches, can double the perceived light in a narrow stairwell. Mount mirrors with heavy-duty D-ring hangers and wall anchors rated for at least double the mirror’s weight. For mirrors over 30 pounds, use two anchors per D-ring or install a French cleat system for added security.
Artwork considerations:
Choose pieces that read well from a distance. Fine detail gets lost when someone’s walking past at speed. Bold colors, high contrast, and graphic shapes work better than busy patterns. If the staircase runs along an exterior wall prone to temperature swings, avoid valuable original art, humidity and heat cycling can warp canvases or fade prints.
Leaning artwork on a staircase shelf or ledge is not recommended unless the shelf has a lip or rail. The vibration from foot traffic can slowly shift frames, and a tumbling mirror or canvas on stairs is a safety hazard.
Many homeowners inspired by budget home makeovers use large DIY canvases made from drop cloths stretched over 1×2 lumber frames and painted with bold geometric patterns. That approach keeps costs under $40 for a statement piece while allowing full customization.
DIY Staircase Wall Projects for Budget-Conscious Homeowners
Decorating a staircase wall doesn’t require dropping hundreds on custom art. Several DIY projects deliver high-impact results for under $100 in materials.
Floating Shelf Display
Install 8–12 inch deep floating shelves every 3–4 feet along the stair wall. Use them to rotate seasonal decor, small plants, or framed family photos. Floating shelf brackets must hit studs or use heavy-duty toggle bolts, each shelf holds 15–30 pounds depending on bracket quality.
Tools needed: Stud finder, drill, level, 3-inch screws or toggles
Board-and-Batten Accent Treatment
Vertical board-and-batten adds architectural interest and costs roughly $2–3 per linear foot in materials. Use 1×3 or 1×4 pine boards (actual dimensions: ¾×2½ or ¾×3½ inches) spaced 12–16 inches apart, attached to the wall with construction adhesive and 18-gauge brad nails. Paint the entire wall and boards the same color for a subtle effect, or contrast the battens for drama.
This project suits open staircases where the wall backs onto a hallway or room, it adds dimension without eating into stairwell width. Following techniques featured in DIY decor projects, many DIYers finish board-and-batten in one weekend.
Wallpaper or Removable Decals
Peel-and-stick wallpaper has come a long way. Modern vinyl options hold up in high-traffic areas and remove cleanly when tastes change. A single accent wall behind the stairs (if open-concept) or along the stairwell creates instant pattern and color. Coverage is about 25–30 square feet per roll: measure wall height × length to calculate rolls needed.
Prep work: Clean walls with TSP or degreaser, fill nail holes with spackle, and sand smooth. Wallpaper telegraphs every imperfection.
Stenciled Feature Wall
For under $30, a large wall stencil and a quart of contrasting paint transform a blank staircase wall. Secure the stencil with painter’s tape, use a foam roller (not a brush, it bleeds under edges), and work in sections. Geometric or oversized floral patterns suit the vertical format. This approach appears frequently in room makeovers as a low-commitment way to test bold patterns.
Lighting Solutions to Highlight Your Staircase Decor
Decor only works if it’s visible. Stairwells often suffer from poor lighting, one overhead fixture at the top or bottom leaves the wall in shadow. Layered lighting fixes that and adds safety.
Picture Lights and Sconces
Battery-operated LED picture lights clamp or stick onto frame tops, casting even illumination without wiring. For a cleaner look, hardwired picture lights run off a switched circuit. Installation requires fishing wire through the wall (doable for experienced DIYers) or hiring an electrician, budget $150–300 per fixture installed.
Wall sconces flanking large artwork or spaced every 6–8 feet along the staircase add ambient light and architectural interest. Choose sconces with shades that direct light up and down, not straight out into eyes. Ensure sconce placement complies with IRC handrail clearance requirements, fixtures must not protrude more than 4 inches from the wall in the path of travel.
LED Strip Lighting
Adhesive-backed LED strip lights tucked under a floating shelf or along the baseboard create a modern glow. Low-voltage strips (12V) are safer and code-compliant for DIY installation. Power them from a plug-in transformer or hardwire to a dimmer switch for adjustable ambiance.
Recessed Step or Wall Lights
For new construction or major renovations, recessed step lights (small fixtures embedded in the wall near each tread) improve safety and highlight architectural details. Retrofit installation in existing stairs is labor-intensive, walls must be opened to run wiring. Expect $50–100 per fixture plus electrician labor.
Safety note: All staircase lighting should be on a three-way switch system, controllable from top and bottom landings. This meets most local codes and prevents anyone navigating stairs in the dark.
Common Mistakes to Avoid When Decorating Staircase Walls
Ignoring Scale
Tiny frames on a two-story wall look like postage stamps. Go bigger than instinct suggests, if a piece feels too large on the floor, it’s probably right-sized for the wall.
Hanging Everything at the Same Height
Staircase walls follow a slope. Arranging frames in a horizontal line fights the architecture and looks awkward. Follow the diagonal angle or create a dynamic cluster that acknowledges the stairs’ movement.
Skipping Wall Anchors
Drywall alone holds almost nothing. Toggle bolts or screw-in anchors rated for the frame or shelf weight are non-negotiable. A falling mirror or heavy frame on stairs is a serious injury risk.
Overcrowding the Space
More isn’t always better. Leave breathing room around each element. A sparse arrangement of three large pieces often reads stronger than twenty small frames crammed together.
Forgetting About Sightlines
Stand at the top, bottom, and midpoint of the stairs while planning. What looks centered from the landing might be invisible from the bottom. Adjust placement to maximize visibility from the angles people actually view the wall.
Neglecting Existing Wall Decor Ideas
Staircase walls should complement, not clash with, adjacent rooms. If the living room features a gallery wall of family photos, repeating that exact theme on the stairs feels redundant. Vary the approach, use mirrors, art, or architectural treatments to differentiate the space while keeping the overall style cohesive.
Conclusion
Staircase walls reward thoughtful design with outsized impact. The vertical space, visibility from multiple angles, and natural rhythm of the stairs create opportunities most rooms can’t match. Whether installing a gallery wall, hanging oversized art, tackling a board-and-batten project, or adding layered lighting, the key is planning the layout, using proper anchors, and scaling pieces to the space. Done right, staircase decor transforms a pass-through zone into a design statement that anchors the home.