

Table of Contents
ToggleA boy’s bedroom is more than a place to sleep, it’s his personal headquarters, creative space, and storage zone for everything from Lego sets to lacrosse sticks. Wall decor sets the tone for the entire room, but getting it right means balancing durability, age-appropriate style, and flexibility as interests evolve. Forget cookie-cutter themes that feel dated in six months. The best wall treatments grow with the kid, survive the occasional soccer ball ricochet, and make efficient use of vertical space. This guide covers practical, tested approaches to decorating boys’ room walls, from toddler-proof installations to teen-approved designs that don’t require a full repaint when tastes shift.
Key Takeaways
- Boys room wall decor serves dual purposes—defining zones and masking wear while creating a space that grows with your child’s evolving interests.
- Choose washable, scrubbable paint with satin or semi-gloss finishes for durability, and match wall treatments to age groups: interactive elements for toddlers, flexible pegboard systems for school-age kids, and functional accent walls for teens.
- Neutral base palettes with rotating display zones keep boys’ room designs fresh without constant repainting, and interchangeable frames or peel-and-stick wallpaper adapt as tastes shift.
- Strategic wall features like growth charts, shadow box jerseys, floating shelves, and pegboard systems maximize vertical space while keeping essential gear organized and accessible.
- DIY wall projects including geometric accent walls with painter’s tape, plywood headboards with French cleats, and rope shelving can transform a boys room for $50–$150 in materials using basic tools.
Why Wall Decor Matters in a Boy’s Bedroom
Walls in a boy’s room do real work. They’re not just decorative, they define zones (sleep area versus assignments space), absorb the visual noise of toys and gear, and can even function as organization systems when treated right.
Good wall decor establishes a cohesive look that makes the room feel intentional instead of chaotic. A boy who feels ownership over his space is more likely to keep it organized, or at least organized by his standards. Wall treatments also mask wear and tear better than flat paint alone. Scuffs from wheeled desk chairs, tape residue from posters, and dings from bunk bed frames are inevitable. Strategic decor hides minor damage and defers the need for frequent repainting.
Think of walls as functional surfaces first. Can they hold pegboard for sports equipment? Magnetic paint for rotating art displays? Cork tiles for evolving collections? Decorative and practical aren’t mutually exclusive. The best boys’ room walls handle both without looking like a Pinterest board threw up on them.
Age-Appropriate Decor Styles for Every Stage
Toddlers and Preschoolers (Ages 2-5)
This age demands durable, non-toxic finishes and decor that can’t be pulled down easily. Wall decals are popular but choose fabric-backed or removable vinyl options rated for multiple repositioning, cheap versions leave adhesive residue on drywall that requires spot-priming before repainting.
Washable paint is non-negotiable. Look for paints labeled scrubbable or stain-resistant: they contain more acrylic binder and resist crayon and marker better than standard latex. Sherwin-Williams Emerald and Benjamin Moore Aura both perform well in high-traffic kid zones, though any paint with a satin or semi-gloss sheen cleans easier than flat.
Keep decor low and interactive: a painted chalkboard section (use real chalkboard paint, not black paint), a magnetic stripe at toddler height, or simple wall-mounted bins for stuffed animals. Avoid anything with small detachable parts or sharp corners. Secure all shelving and frames with drywall anchors rated for at least 50 pounds, toggle bolts work best in standard ½-inch drywall.
School-Age Boys (Ages 6-12)
Interests shift fast. One month it’s dinosaurs, next it’s space exploration. The solution: a neutral base palette with interchangeable accent pieces. Paint three walls in a mid-tone gray, navy, or olive, then use one wall as a display zone for rotating hobbies.
Pegboard is underrated for this age group. A 4×8-foot sheet of ¼-inch pegboard, painted to match the room and mounted on 1×2 furring strips for peg clearance, turns into flexible storage for anything with a hook. Sports equipment, art supplies, gaming headsets, it all stays visible and accessible without eating up floor space.
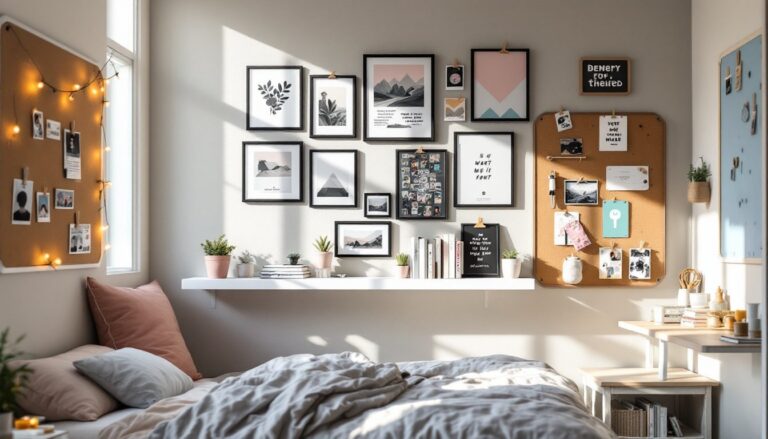
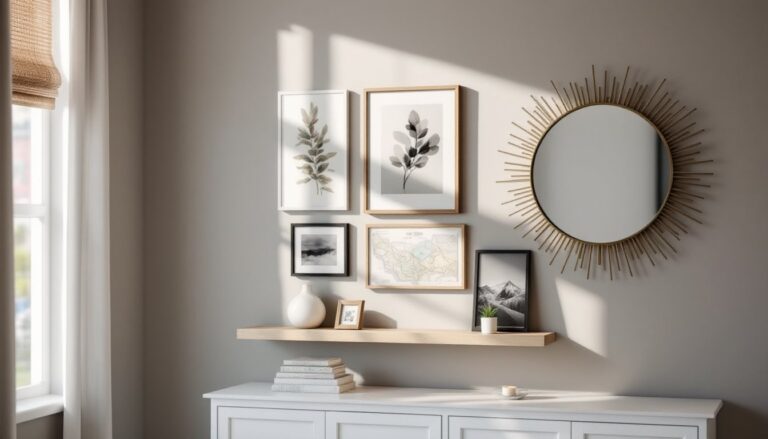
Consider a gallery wall with mismatched frames in the same finish (all black or all natural wood). Frames with hinged fronts or easy-open backs make swapping artwork or trading cards simple. Budget tip from DIY decor enthusiasts: thrift store frames spray-painted in one go create a cohesive look for under $30.
Teens (Ages 13+)
Teens want input, respect it, but steer them toward choices that won’t crater resale value. All-black walls sound cool until it’s time to repaint (black requires multiple coats of primer to cover). Suggest an accent wall approach instead: one dark or bold wall, three neutral.
Peel-and-stick wallpaper has improved dramatically. Brands like Tempaper and RoomMates offer designs that actually stick and remove cleanly, though surface prep still matters, walls must be clean, dry, and smooth. Any texture or sheen on the base paint reduces adhesion.
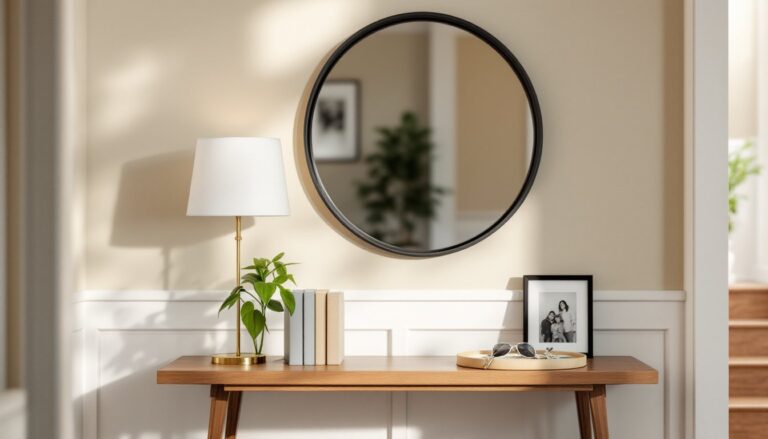
Teen rooms benefit from functional wall space: floating shelves for gaming gear or collectibles, wall-mounted monitor arms to free up desk space, or a corkboard wall section framed in stained 1x2s for a more finished look than raw cork tiles. Industrial pipe shelving fits the older aesthetic and supports serious weight (books, stereo equipment) when lag-bolted into studs.
Warn against damage deposits if renting applies later: command strips rated for the actual weight, never nails in wallboard without anchors, and documentation (photos) of pre-existing marks.
Popular Wall Decor Ideas That Work
Growth Chart Installations: Permanent wooden growth charts (often sold as long planks with laser-etched measurements) can be stained to match trim and mounted directly to studs with 3-inch wood screws. Unlike door-frame pencil marks, they’re portable and become keepsakes.
Sport-Themed Displays: Instead of generic posters, frame actual jerseys using shadow box frames (minimum 2-inch depth). Acid-free backing prevents fabric yellowing. Mount heavy shadow boxes with two D-rings and picture wire, not sawtooth hangers, they can’t support the weight.
Map Walls: Large-format maps (topographic, world, vintage-style) make bold statements. Cork-backed maps serve double duty as pin boards. For a cleaner look, mount maps on ¼-inch MDF cut 2 inches larger on all sides, stained or painted to create a border, then hang as a single unit.
LED Accent Lighting: Adhesive LED strips add ambiance and are relatively safe, choose UL-listed strips with low-voltage transformers. Run strips along the top of baseboards, behind floating shelves, or around a headboard. Avoid installing directly on wallpaper or freshly painted walls (wait 30 days for paint to fully cure).
Name or Initial Decor: Oversized metal or wood letters look intentional when they’re proportional. For an 8-foot ceiling, letters between 12 and 24 inches tall work. Smaller looks cluttered, larger overwhelms. Mount with adhesive strips rated for the material weight or use keyhole brackets screwed into studs.
Floating Shelves as Art: Stagger 12-inch-deep shelves at varying heights to hold books spine-out, small plants, or collectibles. White oak or poplar boards routed with a roundover bit and finished with polyurethane hold up better than particleboard big-box versions. Use a level and stud finder, every shelf bracket must hit a stud or use toggle bolts in drywall.
DIY Wall Decor Projects You Can Tackle This Weekend
Geometric Accent Wall with Painter’s Tape: Choose two or three complementary colors. Use a laser level to project straight lines, then apply FrogTape (the green kind, it seals better than blue) to create triangles, chevrons, or hexagons. Paint lightest color first, let dry 24 hours, tape off next section, repeat. Pull tape at a 45-degree angle while paint is still slightly tacky (about 30 minutes after final coat) to prevent peeling.
Plywood Headboard Wall: Cut a ¾-inch plywood sheet to span the width of the bed plus 6 inches on each side. Sand edges with 120-grit, then 220-grit. Stain (Minwax Early American is a versatile mid-tone) or paint. Seal with two coats of water-based polyurethane. Mount to wall with French cleats, rip a 1×4 at a 45-degree angle, screw one half to studs, the other to the plywood. This makes removal easy and avoids visible fasteners.
DIY Pegboard Accent Panel: Pegboard comes in 2×4 or 4×8 sheets. Cut to size with a circular saw (wear a dust mask, MDF pegboard throws fine particles). Prime both sides to prevent warping. Paint with two coats of semi-gloss latex. Mount on 1×2 furring strips using 1½-inch screws into studs, the air gap behind lets pegs insert fully. Tutorials from renovation DIYers often show pegboard painted the same color as walls for a seamless look.
Stenciled Accent Wall: Large-scale stencils (12×12 inches or bigger) read better than small patterns in a kid’s room. Tape stencil with low-tack painter’s tape, use a foam roller or stencil brush with very little paint (offload onto paper towel first), and dab, don’t brush, to prevent bleed. Wall color should be at least one shade different from stencil color for contrast.
Rope Shelving: Drill two holes through each end of 1×10 boards (pine or poplar). Thread ½-inch manila or polyester rope through, knotting below each shelf. Secure rope to ceiling joists using eye bolts with lock nuts (must go through drywall into joist, use a stud finder). Rope shelving flexes slightly, so it’s not ideal for breakables, but it’s a unique statement piece for design-forward spaces.
Safety Notes: Always wear safety glasses when cutting or drilling. Use a dust mask for sanding or cutting MDF. Keep a fire extinguisher handy when using power tools. If a project involves electrical (like hardwiring LED strips), consult a licensed electrician, DIY electrical work often violates local code and homeowner’s insurance policies.
Material Prep Reminder: Let all lumber acclimate indoors for 48 hours before cutting to prevent warping. Sand all cut edges. Pre-drill hardwood to avoid splits. Test paint colors on poster board taped to the wall and viewed in different lighting before committing to gallons. Pro painters from budget renovation blogs stress that prep work, cleaning walls, spackling holes, priming stains, takes longer than painting but determines the final result.
Most of these projects cost between $50 and $150 in materials and require only basic tools: drill/driver, level, tape measure, saw (circular or miter), and paintbrushes. Lumber and paint prices fluctuate regionally, so always call ahead or check online stock before driving to the home center.