


Table of Contents
ToggleA wall oven isn’t just an appliance, it’s a design anchor. Unlike traditional ranges that squat at counter height, wall ovens sit at eye level, reducing back strain and opening up prime real estate for cooktops or storage below. They signal a kitchen that’s been thoughtfully planned, not just assembled. In 2026, wall ovens blend performance with aesthetics in ways that complement everything from farmhouse kitchens to ultra-modern lofts. Whether renovating or building from scratch, understanding how wall ovens work with cabinetry, ventilation, and electrical systems helps homeowners avoid costly surprises and achieve a polished, functional result.
Key Takeaways
- Decor wall ovens installed at eye level reduce back strain and signal a thoughtfully designed kitchen, making them a smart investment for both comfort and home resale value.
- Choosing between stainless steel and panel-ready finishes depends on your design preference: stainless showcases high-end appliances, while panel-ready models integrate seamlessly into modern kitchen aesthetics.
- Wall oven installation requires two trades—carpentry and electrical—with a dedicated 240V circuit; hire professionals or experienced DIYers to ensure proper support, ventilation clearance, and permit compliance.
- Convection cooking, self-cleaning modes, temperature probes, and smart connectivity are practical features worth prioritizing in modern wall ovens over flashy add-ons.
- Plan wall oven placement early in your kitchen design—a tall pantry column adjacent to the refrigerator is ideal—and verify electrical box location and cabinet cutout dimensions before ordering cabinetry.
What Are Decor Wall Ovens and Why Choose Them?
Wall ovens are built-in units installed into cabinetry or wall framing at varying heights, typically between 27 and 30 inches wide. Unlike slide-in or freestanding ranges, they separate the oven from the cooktop, creating a more flexible kitchen layout. The “decor” designation refers to models that emphasize finish options, trim kits, and design cohesion, think matching handles, custom panels, or flush-mount installations that blend seamlessly with cabinetry.
Ergonomic advantages top the list of reasons to choose a wall oven. Installing the unit at chest or eye level eliminates the need to bend deeply when checking roasts or pulling out heavy casserole dishes. For aging homeowners or those with mobility concerns, this feature alone justifies the investment.
Design flexibility comes next. By decoupling the oven from the cooktop, homeowners can place a gas or induction range at the island, install the oven in a tall pantry bank, or stack two ovens in a single cabinet column, impossible with a traditional range. This separation also means the cooktop area stays uncluttered, and cabinetry layouts can adapt to odd spaces or galley configurations.
Resale appeal matters. Buyers expect wall ovens in higher-end kitchens, and they signal that the space has been designed rather than merely outfitted. That said, installation cost runs higher than a standard range (more on that below), so budget accordingly.
Design Styles and Finish Options for Wall Ovens
Most wall ovens ship in stainless steel, black stainless, white, or black exteriors. The door handle and control panel establish visual tone. Professional-style models often feature heavy-duty handles and knob controls, while European designs lean toward minimalist touch panels and recessed handles.
Manufacturers now offer panel-ready or custom-panel models that accept cabinet door fronts. These units arrive with a bare frame, allowing the homeowner or cabinet maker to attach wood, laminate, or painted panels that match surrounding cabinetry. From ten feet away, the oven disappears entirely, a favorite trick in modern and transitional kitchens where appliance visibility is minimized.
Trim kits matter more than most DIYers realize. These metal frames bridge the gap between the oven chassis and the cabinet cutout, covering any minor measurement errors and providing a finished edge. Some kits are flush-mount, sitting nearly flat with the cabinet face: others protrude slightly. Verify trim compatibility before ordering, the oven and trim are often sold separately.
Stainless Steel vs. Custom Panel-Ready Finishes
Stainless steel remains the workhorse finish. It’s durable, heat-resistant, and complements most appliance suites. Fingerprints show up (especially on mirrored stainless), but smudge-resistant coatings have improved. Cleaning requires non-abrasive stainless cleaner and microfiber cloths: never use steel wool or harsh chemicals that scratch the surface.
Panel-ready finishes offer seamless integration but demand precision. The cabinet door must align perfectly with adjacent doors, and the hinge hardware needs to support the added weight of the oven door mechanism. If the oven is in a tall column with other paneled appliances (like a refrigerator or microwave), the visual payoff is dramatic. But, any cabinet settling or hinge sag becomes obvious. Installation is best left to a cabinet professional or experienced DIYer with access to precise measuring tools and European hinge jigs.
Both approaches work: the choice hinges on whether the kitchen leans toward showcasing high-end appliances or hiding them behind a unified cabinet facade.
Choosing the Right Size and Configuration
Standard wall oven widths are 24, 27, and 30 inches. The 30-inch models dominate the market, offering 4.5 to 5.0 cubic feet of interior space, enough for a Thanksgiving turkey or multiple sheet pans. The 27-inch units (around 4.0 cubic feet) suit smaller households or kitchens with limited cabinet width. The 24-inch ovens typically appear in compact European designs or budget lines.
Height varies. Single ovens are roughly 28 to 30 inches tall, while double wall ovens (two stacked ovens in one chassis) run 50 to 52 inches. A microwave-oven combo unit pairs a microwave above a single oven, also hitting around 50 inches overall.
Check cutout dimensions in the spec sheet, not just the appliance’s exterior. The cutout is the rough opening in the cabinetry, and it must provide clearance for the oven chassis, wiring, and ventilation. Most 30-inch ovens require a cutout width of 28 ½ to 29 inches and a height of 28 ¼ inches (for single units). Double-check against your cabinet plans: a mismatch means expensive rework.
Depth matters for flush installations. Standard wall ovens protrude about 24 inches from the wall, while cabinet depth is typically 24 inches (or 25 inches for full-overlay doors). If the oven extends past the cabinet face, it looks awkward. Some premium models offer “built-in” depth closer to 23 inches, sitting flush or nearly flush.
Single vs. double configuration: Double ovens shine during holidays or when batch-cooking, but they consume significant vertical real estate. If cabinet space is tight, a single oven paired with a separate speed oven or microwave in another location offers more layout flexibility.
Installation Considerations for Wall Ovens
Wall oven installation is a two-trade job: carpentry (or cabinetry) and electrical. Unlike ranges that plug into 120V outlets, wall ovens require a dedicated 240V circuit with 30, 40, or 50-amp service, depending on the model. The electrical box location must align with the oven’s junction box, typically at the back, top, or bottom of the chassis. Check the installation manual early: moving an electrical box after cabinets are installed is a headache.
Permit requirements vary by jurisdiction. Most building departments consider a wall oven a permanent appliance alteration requiring an electrical permit (and sometimes a mechanical permit if gas). Inspections verify proper wire gauge, circuit breaker rating, and secure connections. Skipping permits risks failed inspections during a home sale and potential insurance complications if a fire occurs.
Cabinet modification is almost always necessary. The cabinet must have an open back to allow the oven chassis to recess and provide ventilation. Factory-made oven cabinets include this: retrofit installations may require cutting away the back panel. Leave at least 1 inch of clearance around the sides and top per manufacturer specs to prevent overheating.
Support structure is critical. A 30-inch wall oven weighs 100 to 150 pounds empty. Add a roast and cast-iron cookware, and the load climbs. The cabinet bottom must rest on a solid floor or be supported by blocking between studs if mounted in a wall. If installing in an island or peninsula, ensure the base cabinet has a reinforced platform. Some pros install a ¾-inch plywood platform spanning the cabinet width.
Electrical hookup involves connecting three or four wires (two hots, one neutral, and ground) to the oven’s terminal block. Wire gauge must match the breaker: 10 AWG for 30-amp circuits, 8 AWG for 40-amp, 6 AWG for 50-amp (copper wire: aluminum requires different sizing). Use a conduit or NM cable rated for the application. Never splice wires inside the cabinet, run a continuous cable from the breaker panel to the oven.
If replacing an existing wall oven, verify that the new model’s cutout and electrical specs match. Otherwise, plan for cabinet alterations and potentially upgrading the circuit.
Pro tip: Have a second person on hand. Wrestling a 130-pound appliance into a cabinet cutout solo invites pinched fingers and drywall damage.
Top Features to Look for in Modern Wall Ovens
In 2026, wall ovens pack more tech than ever. Focus on features that solve real problems, not just flashy add-ons.
Convection cooking uses a fan to circulate hot air, reducing cook times by up to 25% and promoting even browning. True (or European) convection adds a third heating element behind the fan, further improving performance. For anyone who bakes regularly or roasts large cuts of meat, convection is non-negotiable.
Self-cleaning modes come in two flavors: pyrolytic (high-heat) and steam. Pyrolytic cycles heat the oven to 800°F or higher, incinerating food residue to ash that wipes away easily. It works well but locks the door for several hours and consumes significant energy. Steam cleaning uses water and lower heat to soften grime, gentler, faster, but less effective on baked-on messes. Many appliance testing labs rate pyrolytic as superior for heavy use.
Smart connectivity allows remote monitoring, preheat commands, and recipe downloads via Wi-Fi. It’s handy for starting the oven from the grocery store or receiving alerts when the timer expires. But, connectivity depends on router placement, if the kitchen sits far from the router, performance suffers. Security is another consideration: keep firmware updated to patch vulnerabilities.
Temperature probes insert into roasts or poultry and automatically shut off the oven when the target internal temp is reached, no more guessing or opening the door repeatedly. Look for models with dual probes if cooking multiple proteins.
Rapid preheat cuts warmup time from 15 minutes to under 10 by firing all heating elements simultaneously. It’s a small win that adds up over months of daily use.
Sabbath mode disables displays and automatic shutoffs, complying with religious observances. While niche, it’s essential for observant households.
Integrating Wall Ovens into Your Kitchen Design
Placement drives the entire layout. The classic spot is a tall pantry column adjacent to the refrigerator, grouping cold and hot appliances in one zone. This setup minimizes cross-traffic and keeps the work triangle (sink, cooktop, refrigerator) unobstructed. But, it sacrifices pantry storage unless the column is oversized.
Another approach is flanking the range or cooktop with wall ovens on either side, creating a symmetrical “chef’s wall.” This works in larger kitchens (12 feet or wider) and signals serious cooking intent. The downside: it concentrates heat in one area, which can overwhelm nearby cabinets or make the space uncomfortable in summer.
Island or peninsula installation is less common but growing in popularity. Running electrical to an island requires trenching the floor or routing conduit through the basement or crawl space. Ventilation also becomes trickier, any oven generates heat, and an island location may lack nearby soffits or vents to dissipate it. Check local codes: some jurisdictions restrict island oven installations due to fire egress concerns.
Height placement should put the oven door handle between waist and shoulder height for the primary cook, typically 36 to 48 inches off the floor. For double ovens, the lower oven will sit lower, so prioritize comfort for the most-used unit (usually the larger bottom oven).
Coordinate finishes with other appliances. If the refrigerator and dishwasher are stainless, a black wall oven stands out awkwardly. Panel-ready units solve this by matching cabinetry, but if budget limits that option, stick to a consistent appliance finish.
Don’t forget ventilation. While wall ovens don’t produce combustion gases like gas ranges, they still exhaust heat and steam. If the oven sits in a cabinet column with a microwave or warming drawer above, ensure the cabinet has ventilation slots or a rear vent path. Trapped heat shortens appliance lifespan and can warp wood cabinetry.
Several kitchen design resources emphasize the importance of planning appliance placement early, before cabinetry is ordered. Once cabinets arrive, making changes is expensive. Draw the layout to scale, mark electrical and plumbing, and walk through daily tasks mentally. Does the oven door swing into a walkway? Is the cooktop far from the oven (forcing awkward transfers)? Address these issues on paper, not during installation.
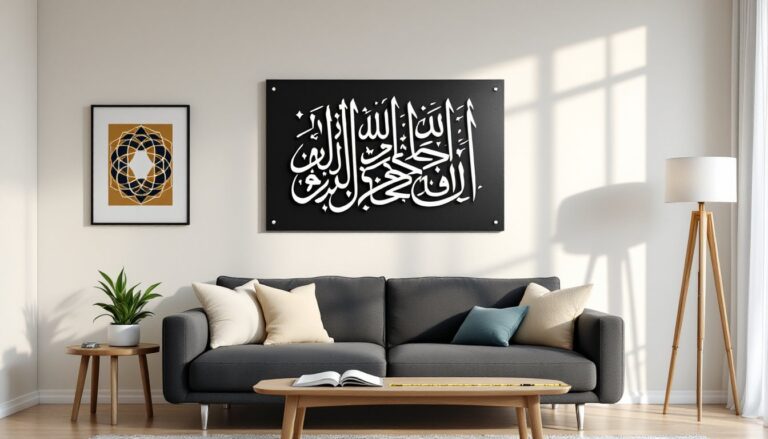
For visual continuity, some designers pair wall ovens with complementary decor elements like open shelving or tile backsplashes that echo the oven’s finish, stainless brackets with stainless appliances, wood shelves with panel-ready units. This subtle repetition ties the space together.